Creating workspaces in D365 Finance & Supply Chain Management – Easy & efficient tools you can utilize

Let’s be honest, using an ERP system can be overwhelming at times, and surely consultants who have implemented systems always try their best to simplify processing for users.
Aside from its objective to optimize procedures to address business needs, Microsoft Dynamics 365 Finance & Supply Chain Management boasts about its minimalist interface, and continuously rolls out features to improve user experience to ensure efficient and effective processing.
In a series of posts, we will explore the different easy tools available within D365 Finance & Supply Chain Management (SCM) which can aid us in utilizing the system.
In this article, we will explore workspace creation.
Creating customized workspaces
Workspaces in D365 Finance & SCM aim to group together a set of tasks that a user usually does in the system. Each activity can be accessible to them in a workspace, with the objective of increasing productivity and constructing patterns to minimize clicks and quickly create informed decisions.
D365 Finance & SCM has predefined, standard workspaces, grouping together tasks that specific roles usually do in the system. If your organization has specific tasks for a role, you can always create your own customized workspace.
Let’s create a workspace. In the Default dashboard, right click on the right side of the screen and click Personalize: Workspaces. A floating dialog will appear where you can click + Add a page.
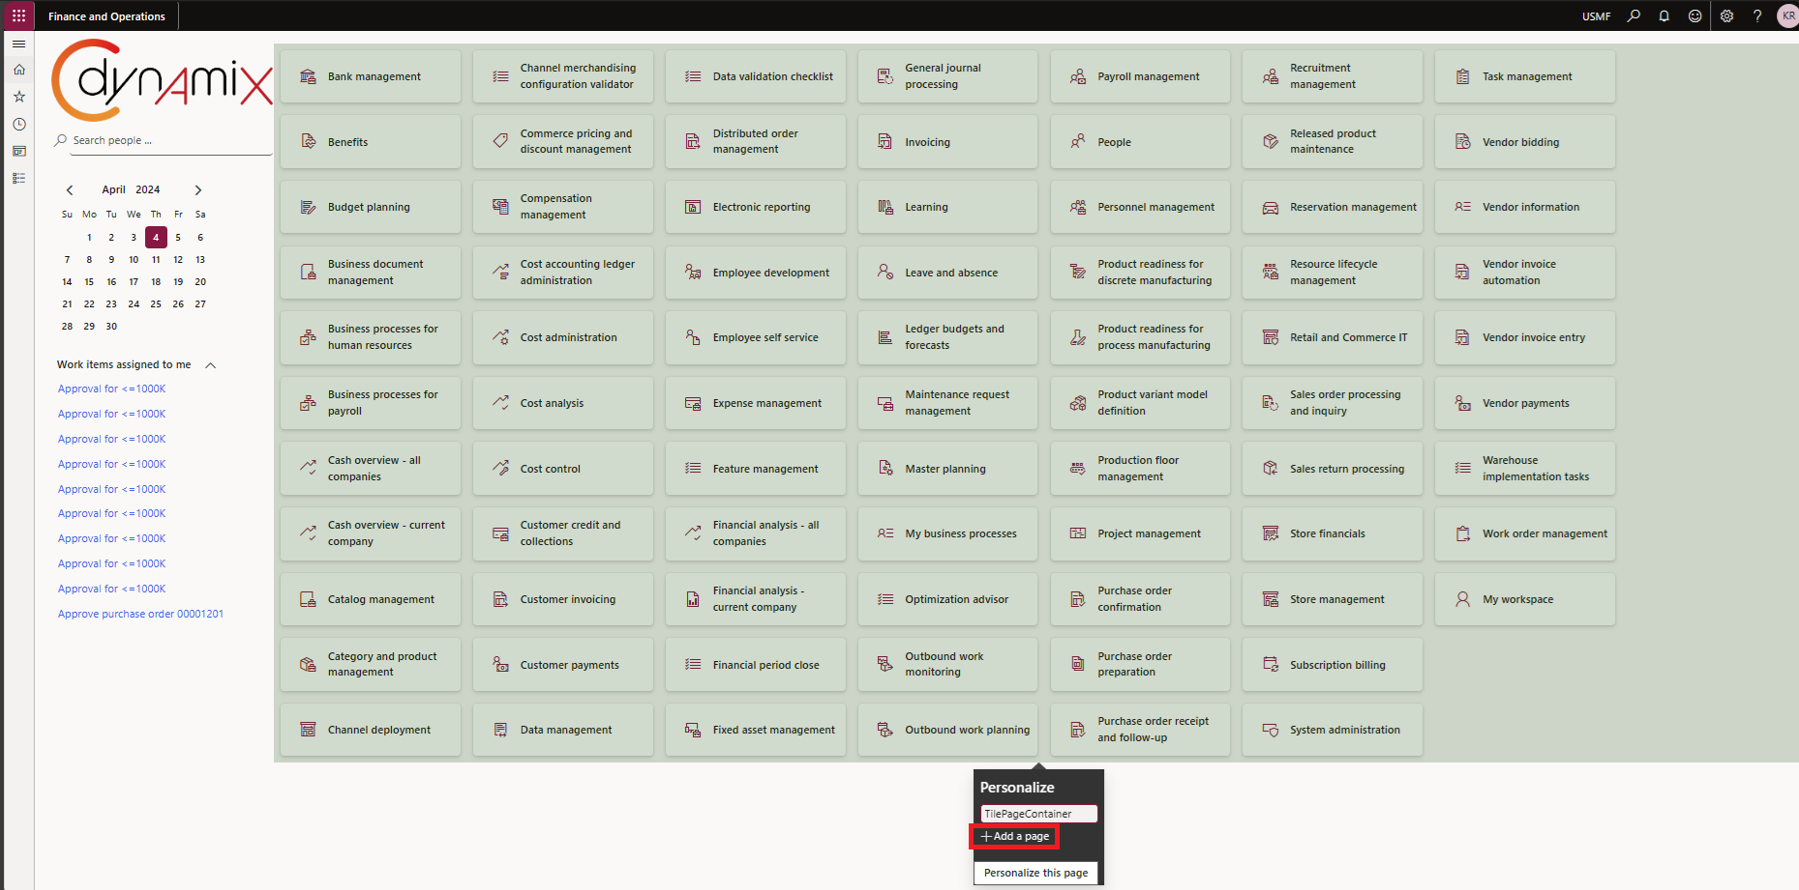
Click Workspace, and the system will ask you to enter a Name for your custom workspace.
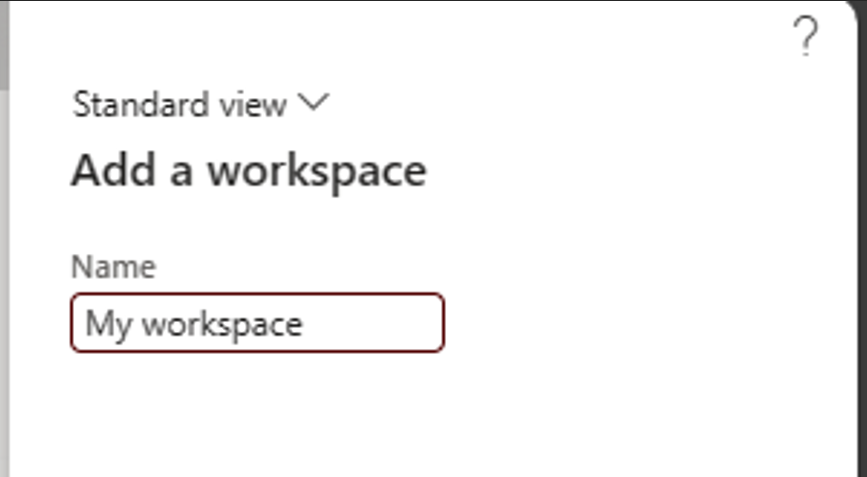
Once entered, click OK and the workspace will be added in your default dashboard.
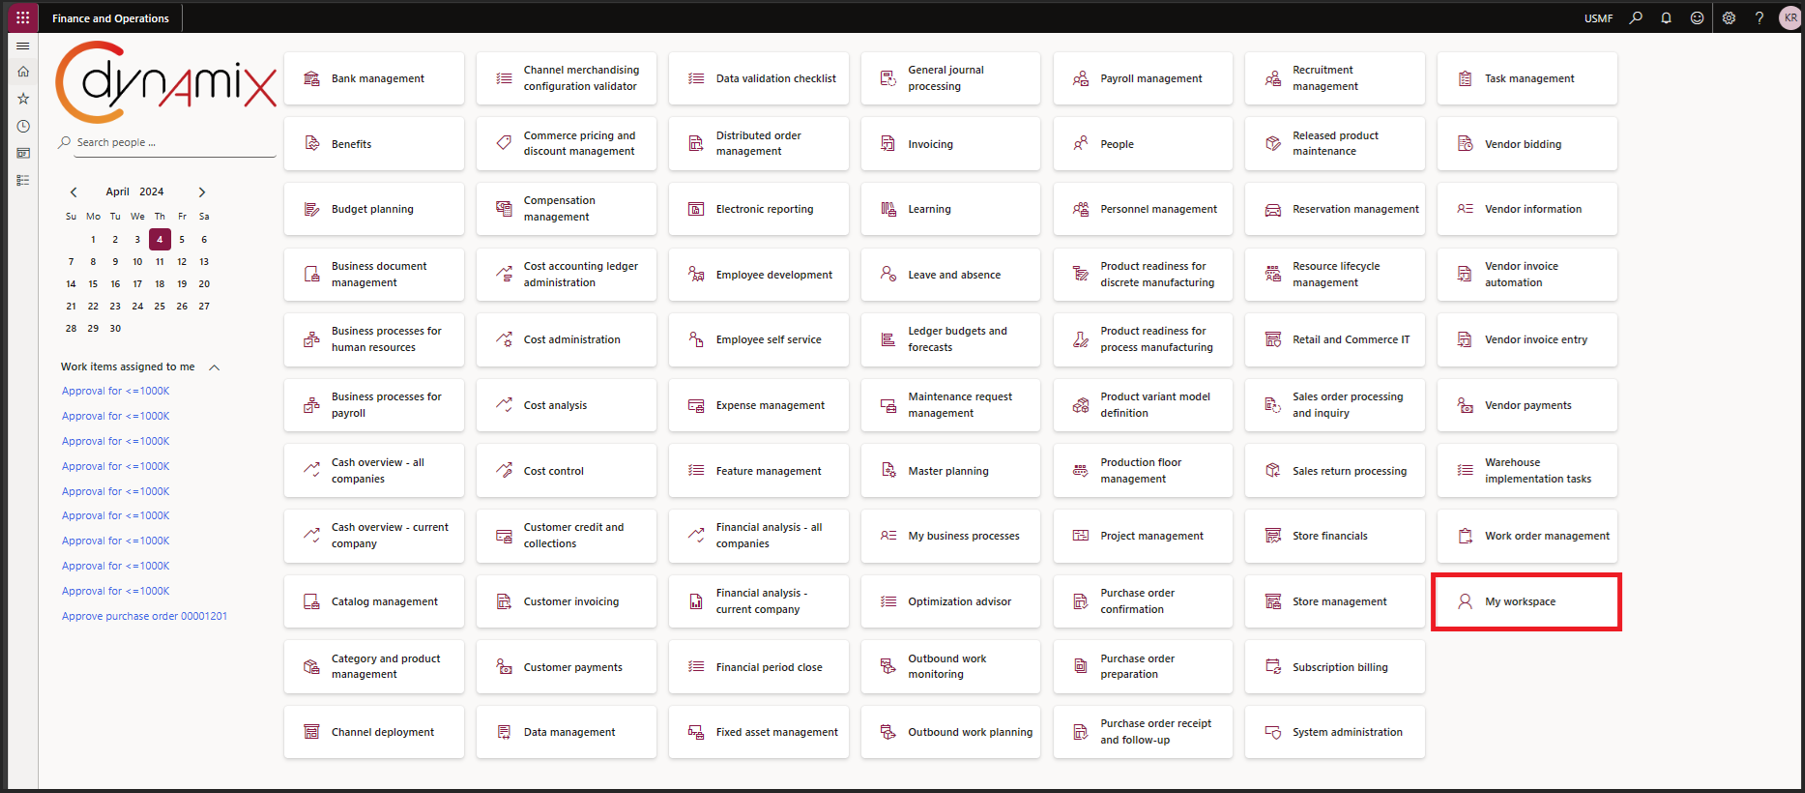
When you do this personalization, this will only be displayed for your user account, and if needed, Personalization can be shared to other users.
Now, you can add pages to your workspace.
There is an Option button available in a page, where you can click Add to workspace under the Personalize section.
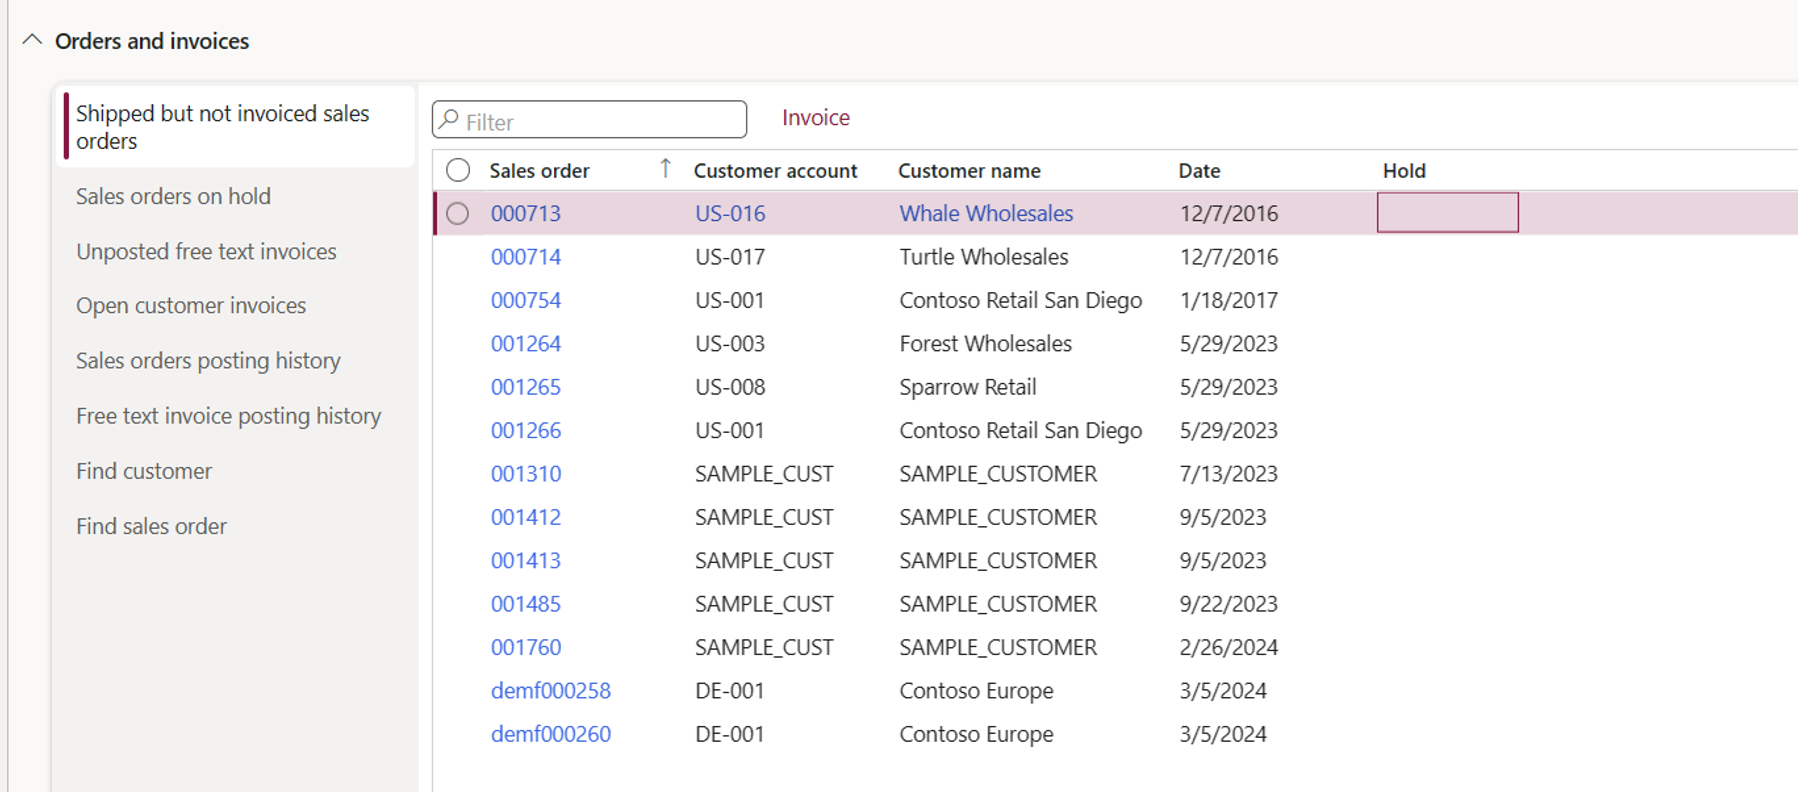
Say, you’d like to see all customer transactions as a list page in your workspace. We can do this by navigating to a customer record. Under Accounts receivable > Customers > All customers, select a record and click on the Customer tab on the action pane. Then, click Transactions. The screen will show you the transactions for the customer you selected.
In the address bar of your browser, click to highlight the URL and press Enter. The system will reload the customer transactions page to display all transactions of the current entity for all customers.
Now, we want this list page in our custom workspace, so we don’t have to reload and navigate to a Customer record every single time.
Click the Options tab on the action pane and click Add to workspace. Make sure that you select the Workspace name you created.

In the Presentation field, you can select either Tile, List, or Link. This refers to how you want your data to be presented in your workspace
Tiles usually display a counter of the records you add to a workspace. It is perfect for tracking certain data which may require action.

List refers to a grid view of the data you want to add in your workspace. This provides a quick overview or inquiry of the records you need to see when you open your workspace. Although the fields that you can add is limited to eight (8), there is a link at the bottom easily redirect you to view the full list.
Adding a Link to your workspace is simply providing an accessible way of redirecting to another page, one quick away.

Back to our sample, we can try configuring it as all three to see the difference.
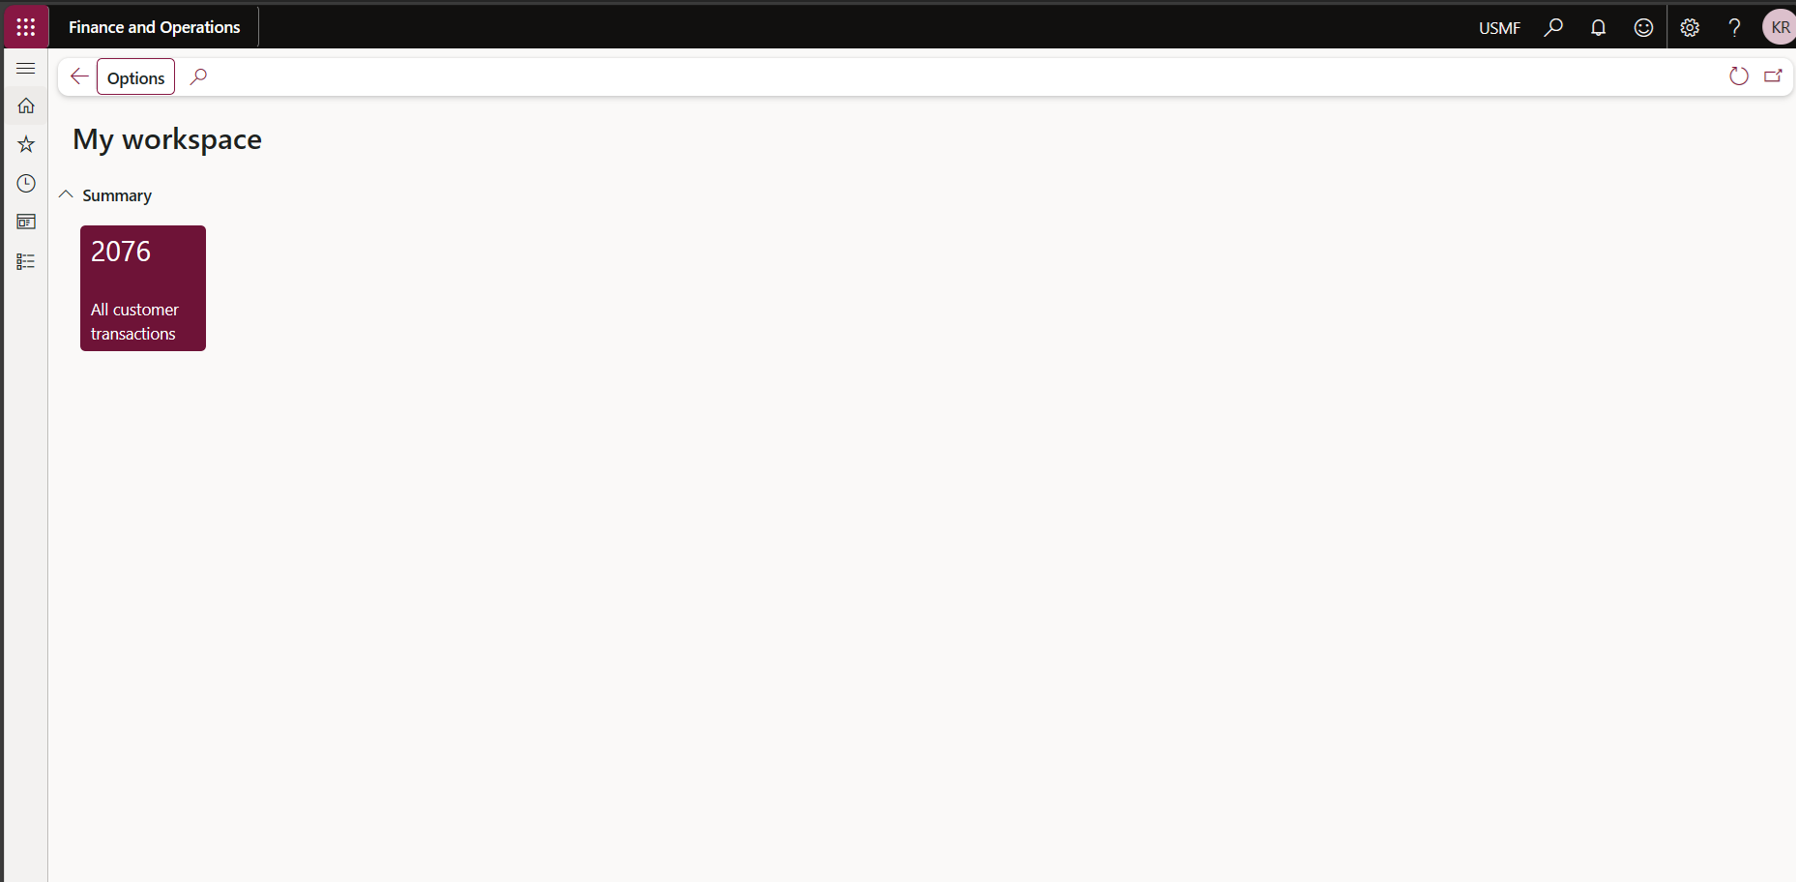
When you select Tile, a dialog will be displayed asking you to enter the name for the Tile. Here, you have the option to show the count and select the tile size.
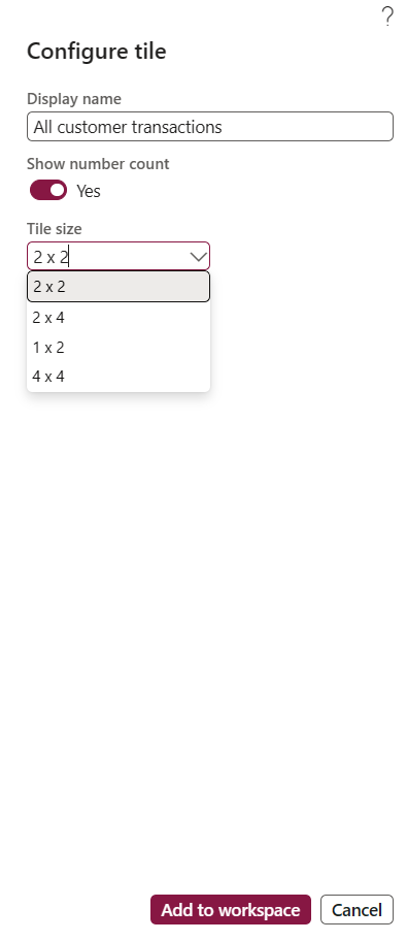
Once done, click Add to workspace. It will show up on your workspace like below:
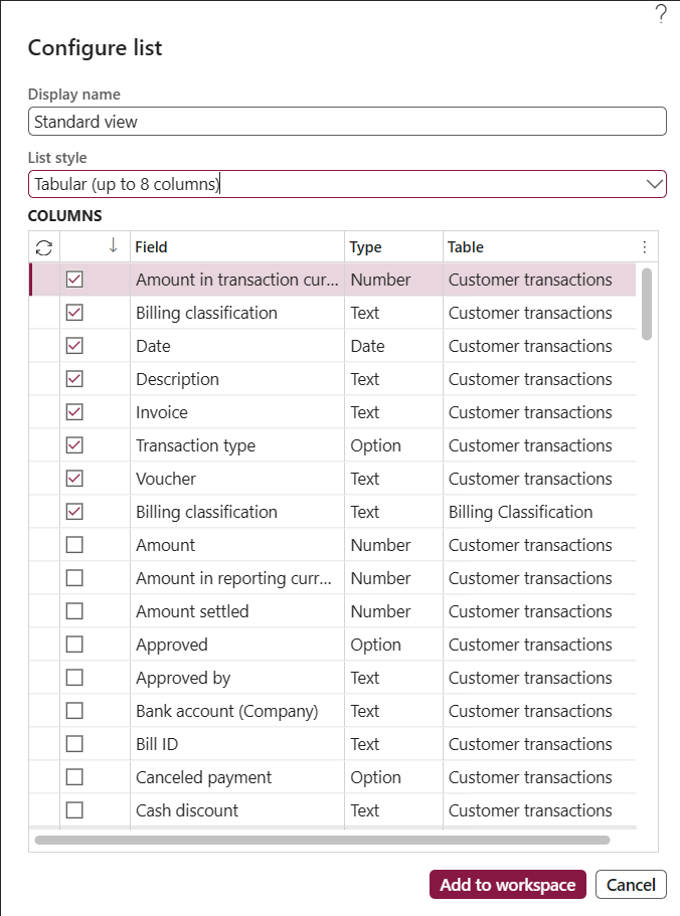
Now, let’s configure it as a List. Back to the Customer transactions page, click Options > Add to workspace. Select your workspace name and select List in the Presentation field. Click Configure.
The system will prompt you with a dialog, asking you to configure which fields to display in your list. You can select up to eight (8) fields. Once done, click Add to workspace.
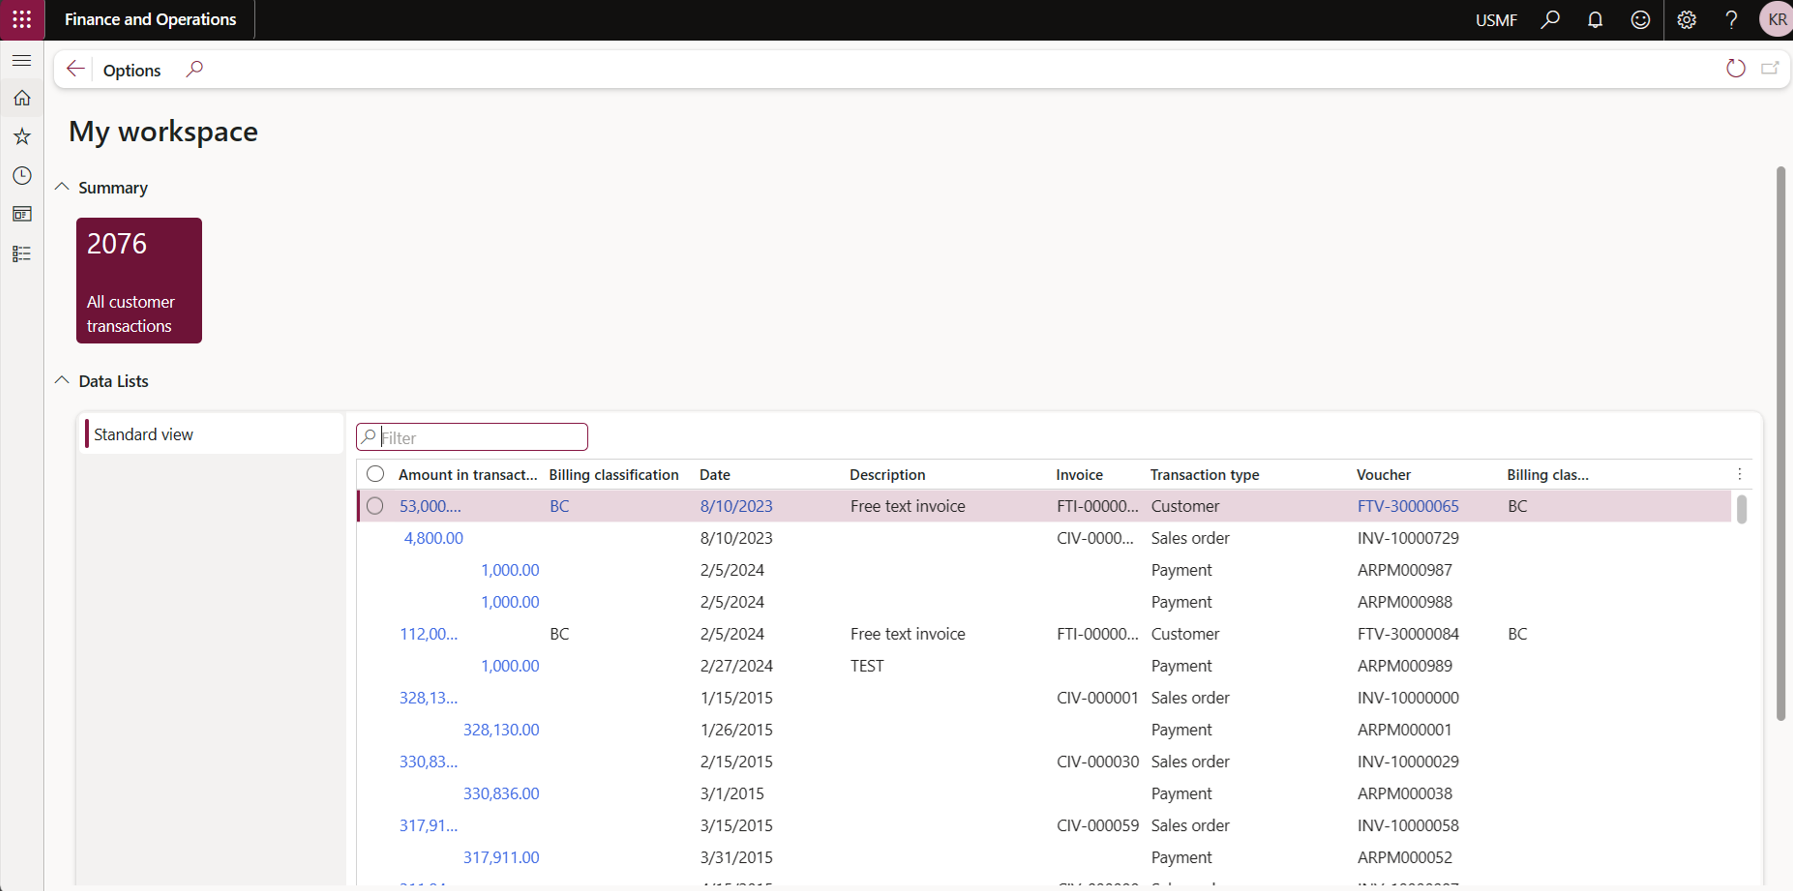
Our workspace will now look like this:
Lastly, let’s configure it as a Link. Back in the customer transactions page, click on Option > Add to workspace; select your workspace name and select Link in the Presentation field. Click Configure.
The system will display a dialog prompting you to enter the name or text that will be displayed as the link. You can also enter a Group name if you want your links to be sectioned together.
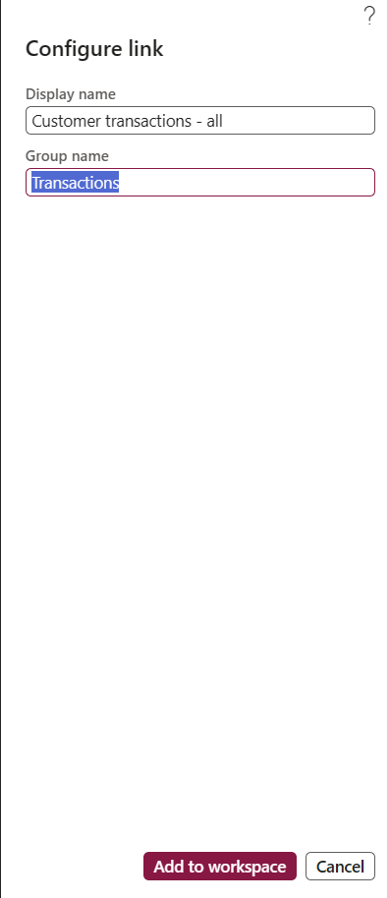
Once done, click Add to workspace.
This is how our workspace looks like with all three:
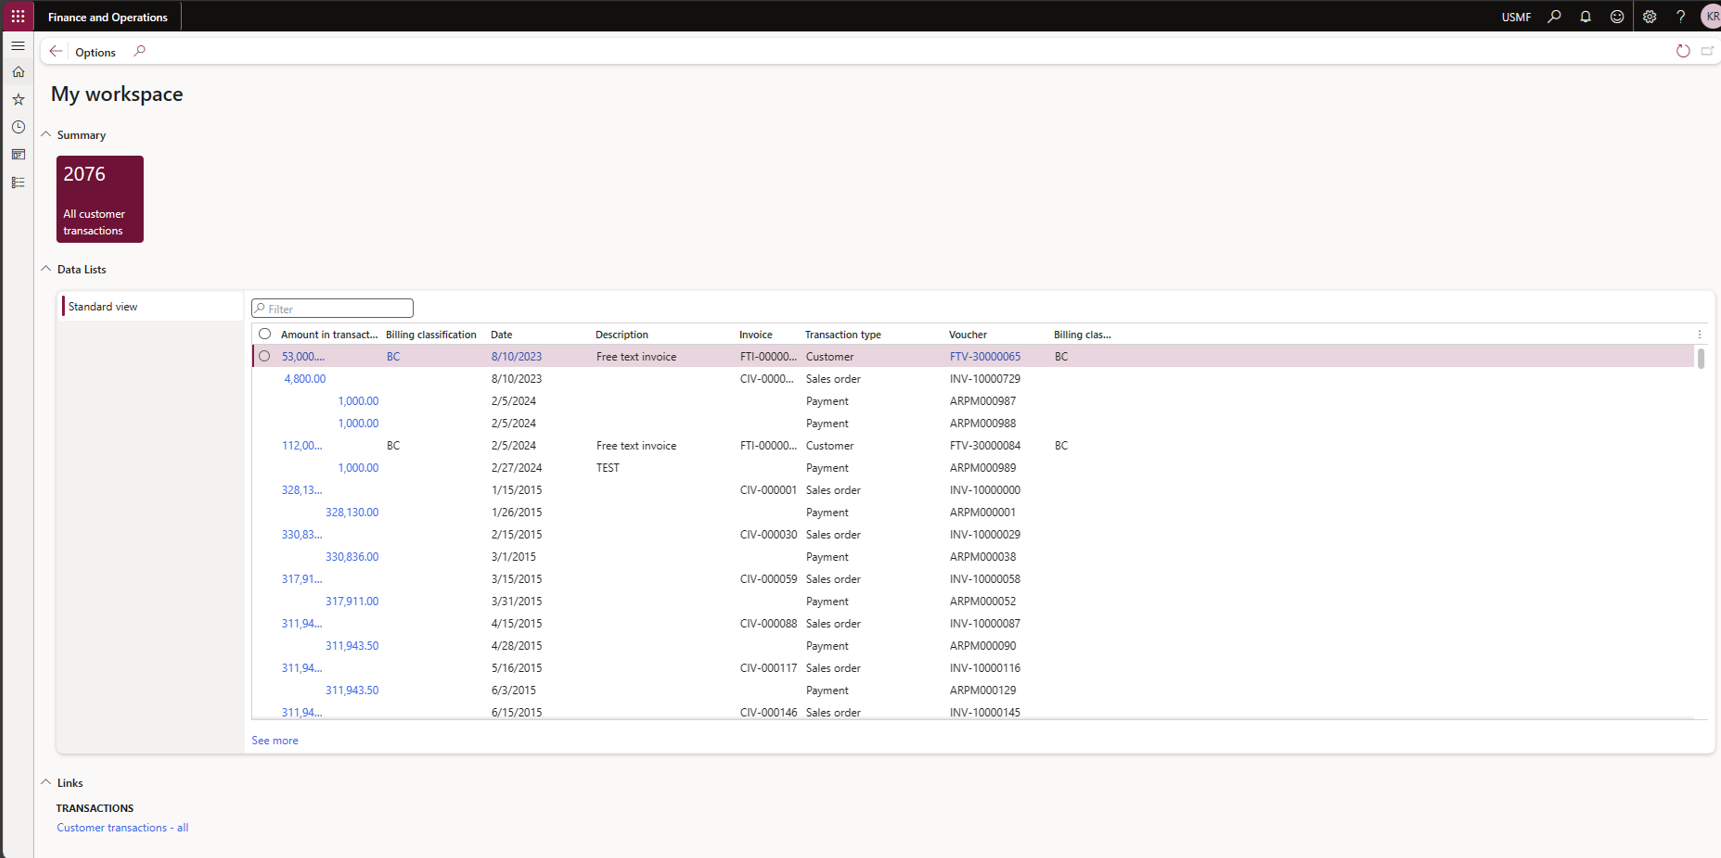
Overall, it’s a fun way of organizing things you want to see in your workspace. You can personalize it to your preference and utilize it to make your job a lot more efficient and effective. It lessens the hassle of navigating through a ton of links and pages, and this feature is easy and accessible, something that you can get creative with.
Let’s explore more features in the next post. Until then, happy DAXing!
Solutions that solve
We optimize business applications and provide effective software solutions.