Setting up email body for documents in D365 Finance & Supply Chain Management

When you’ve been using D365 Finance and Supply Chain Management for some time now, you might be aware that you can send documents via email using the Print management setup. This is a nice feature that can help users when they require email sending of certain documents to stakeholders.
As an example, Purchase orders can be set up in Print management to automatically be sent to suppliers via email. The document is sent as an attachment to the recipients in the format specified during set up.
However, it’s been a pain point for quite some time that these sent emails are only sent as emails with attachments—no email body is configured.
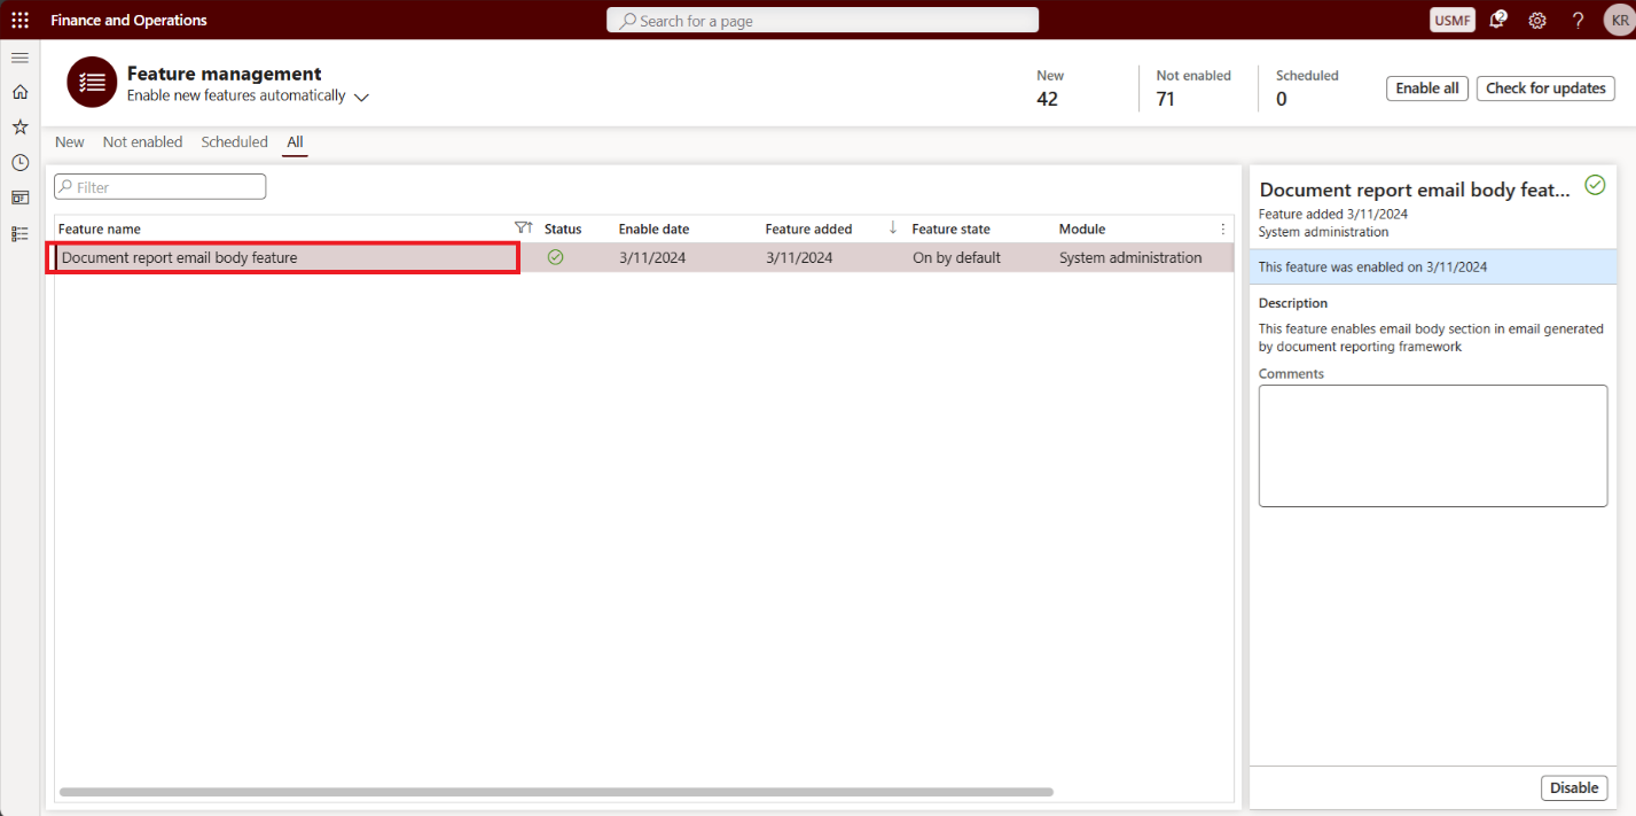
From Dynamics 365 Finance’s product version 10.0.39, a new feature has been added called Document report email body feature . This feature enables users to configure the email body section of documents generated using the document reporting framework.
Once enabled, when you go to the Print management setup of any document, you’ll see that you can setup the email body with the different setup options available:
Font sizes, font styles, colors, and even images can be formatted for the email body.
Let’s try it out by creating a simple email body for a Purchase order confirmation document.
First, ensure that the feature is enabled in your environment. In the long run, the feature will be turned on by default in the system.
Next, let’s set up the print management set up for the Purchase order.
Go to Accounts payable > Setup > Forms > Form setup > General tab > Print management.

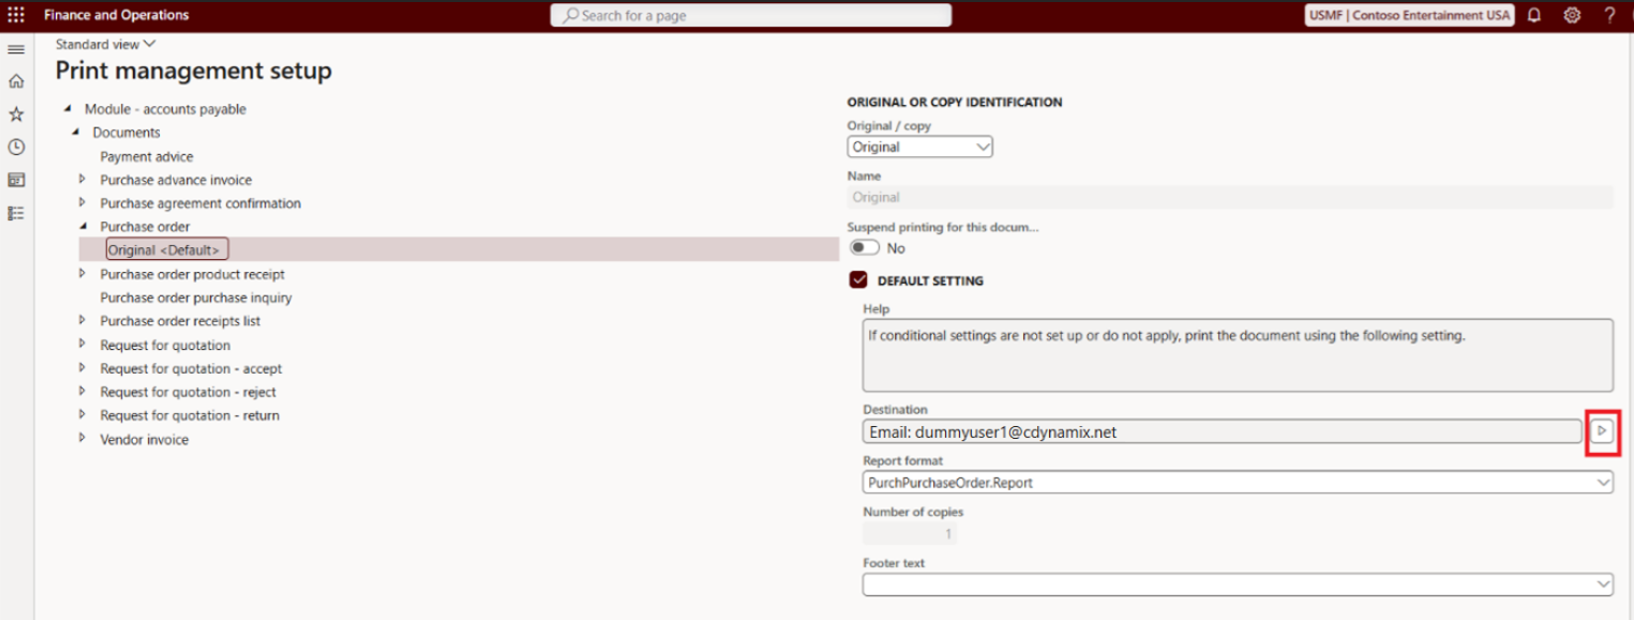
Expand the Purchase order branch and click Original. If there are no settings for the document yet, right click and click New.
Under Destination, click this icon:
Click Printer setup.
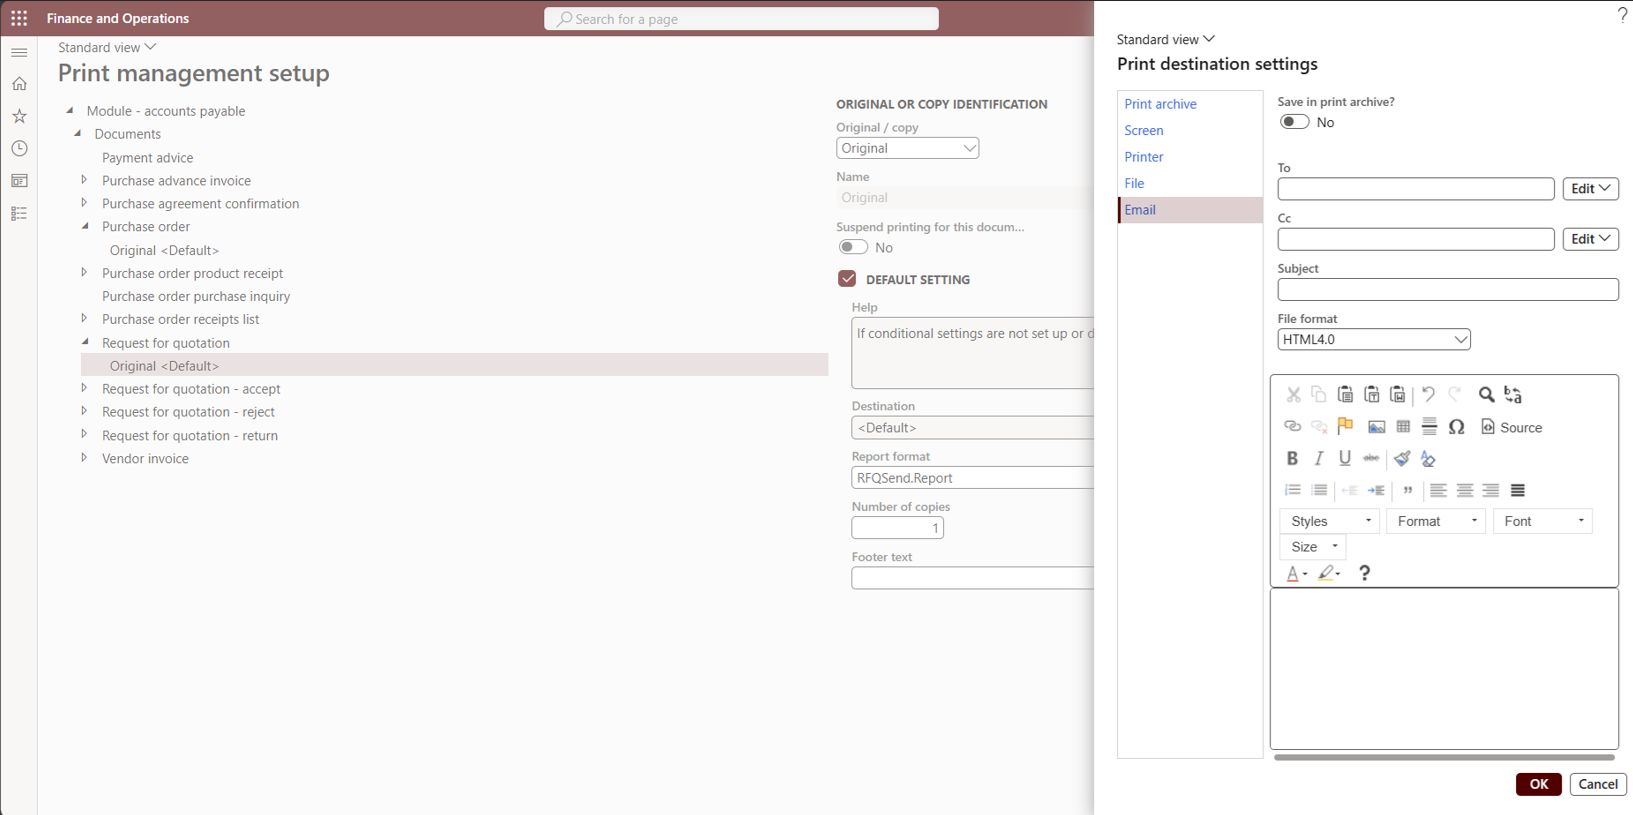
In the Print destination settings dialog, select Email.
Here, you can set up the Email recipients by assigning email addresses:
a.) defaulted from the Vendor master according to purpose.
b.) vendor primary contact
c.) or you can manually input specific email addresses
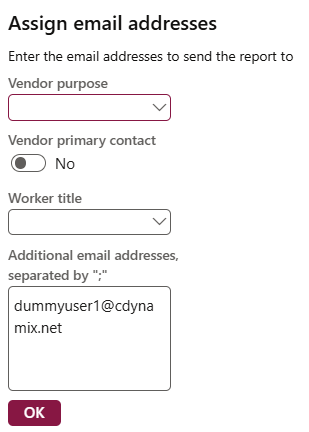
For my sample, I opted to input my own email address.
After clicking OK, you can enter a Subject line for your email and specify which format of the document attachment you want to use.
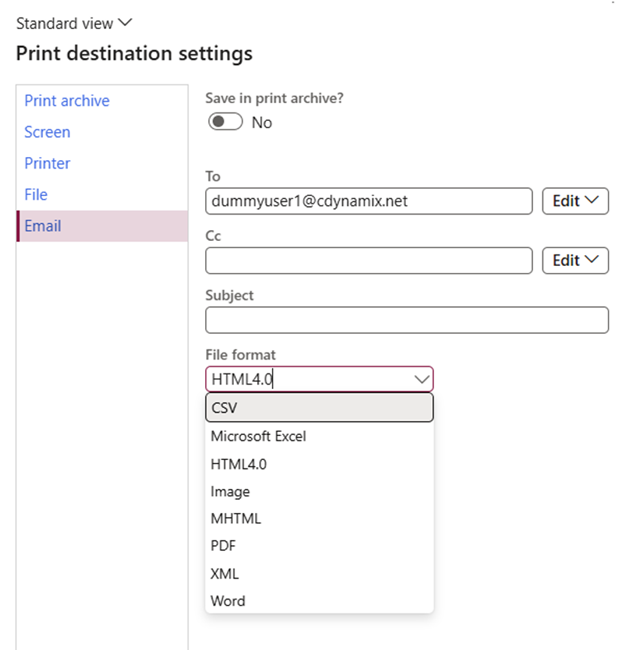
It can be in PDF, CSV, Microsoft Excel, HTML 4.0, Image, MHTML, XML, or in Word format.
Then, in the email body section, enter the message you want the recipient to receive along with the document attachment.
For my sample, I tried to insert a company logo in image format using a URL and wrote a simple message body.
Once you are happy with your email body, click OK to save the setup for the document.
Next, let’s try generating a Purchase order confirmation document using the Print management settings.
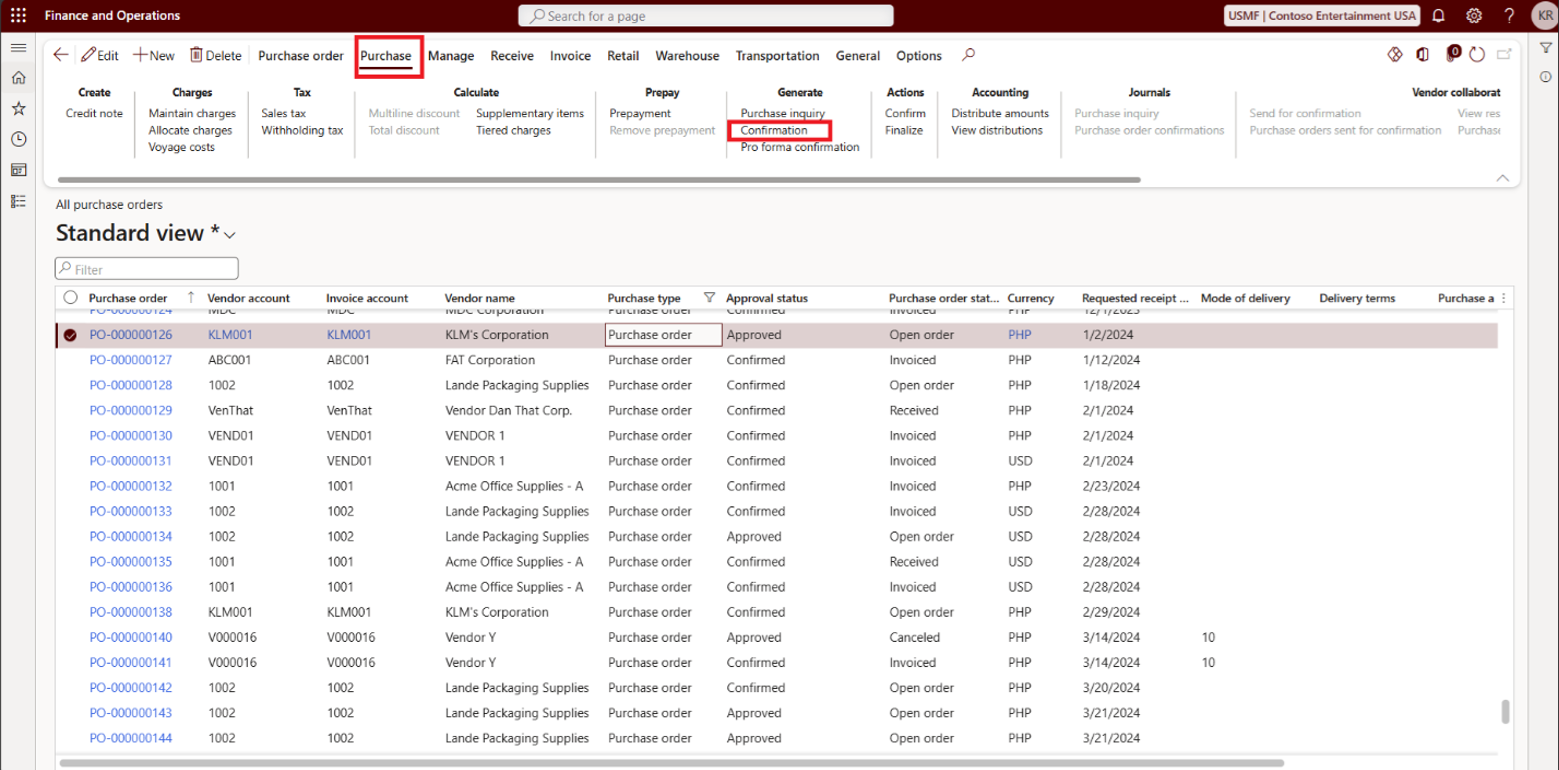
Under Procurement and Sourcing, go to Purchase orders > All purchase orders. Select a record where the Approval status is Approved and has not yet been confirmed.
Click the Purchase tab on the action pane, and then click Generate confirmation.
In the Confirm purchase order dialog, set the Use print management destination toggle to Yes, along with the Print purchase order toggle.
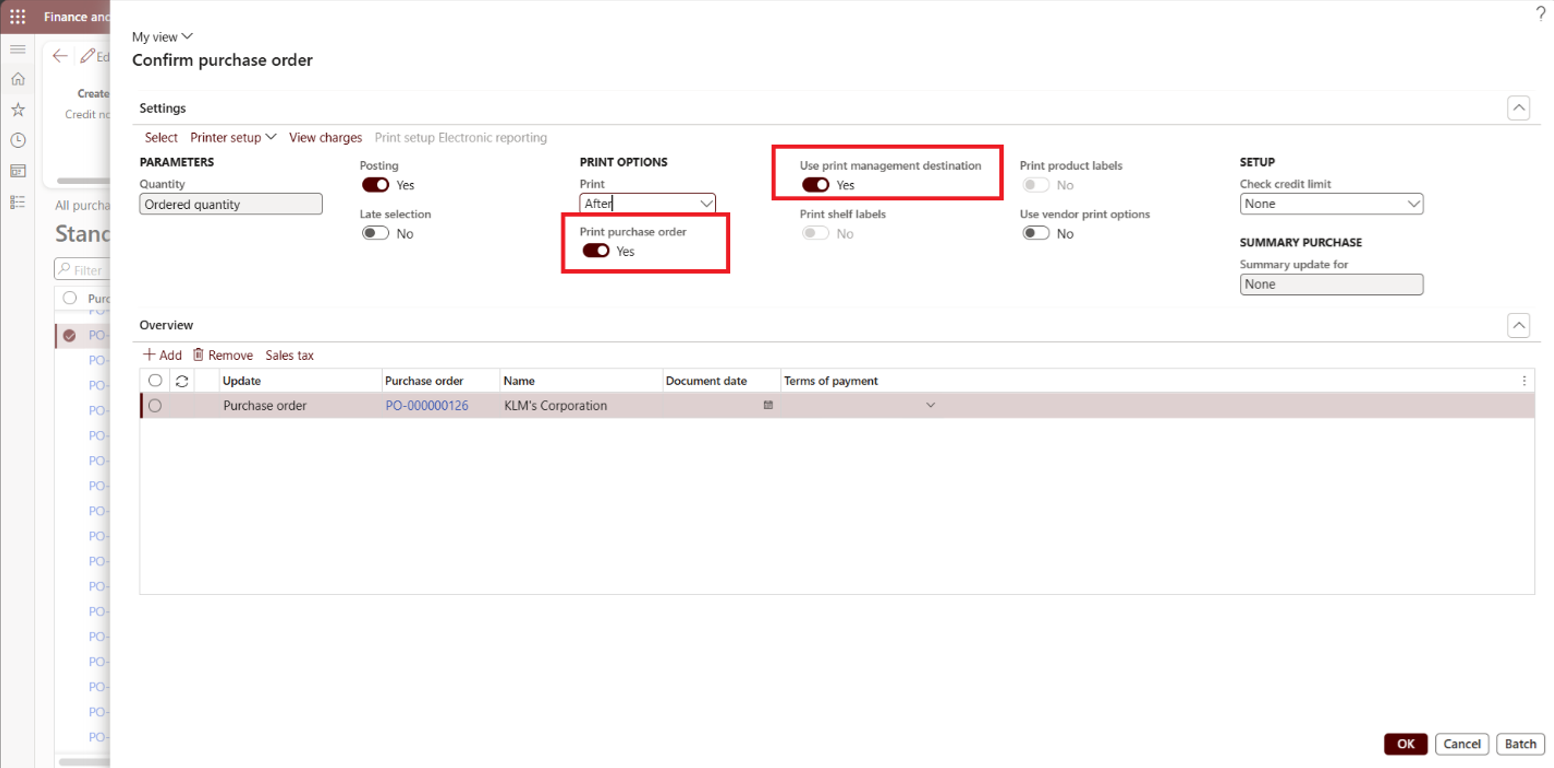
Click OK.
Once the email has been successfully sent, an Infolog will be displayed on the page.

Then, check your recipient’s email inbox.
For me, I received the Purchase order confirmation attachment along with the email body I configured.

You can do this with any document you like in D365 Finance and Supply Chain Management to try on your own. Use it in different formats and reports, and let us know if you liked the feature.
At the moment of writing this blog, it seems that we can’t use placeholders for the email body yet, and there is no integration with another system feature called Electronic reporting. Hopefully, we’ll see future updates include more features that we can utilize for similar functions.
Solutions that solve
We optimize business applications and provide effective software solutions.