No code? No problem: Create custom fields in D365 Finance & SCM without coding (Part 1)

A decade ago, I saw the Microsoft Dynamics AX 2012 user interface for the first time. I can’t remember if it was the Released products window or the Purchase order window, but I still remember what I first thought the moment I saw it: there’s a lot. A lot—it was information overload, there were so many words and numbers to look at that I wouldn’t even know where to start.
Even with its successor, Microsoft Dynamics 365 Finance & SCM, there are still loads of fields out-of-the-box—with the ever-changing need to record important data essential to the business.
Sometimes, we recommend repurposing some standard informational fields to address the requirement—but, often than not, it seems that these aren’t just enough!
We end up customizing some informational fields that you may need, and it’s always been done via back-end by our developers.
Did you know that you can do it via front-end?
With the right access, you’ll easily be able to create custom fields for editable tables where you’ll need them. Though, keep in mind that this is just for informational purposes, and if you need to create fields that require a certain functionality (like getting cascaded or inherited to another transaction page), you will have to get help from your developer.
Creating custom fields
For easier navigation and simpler understanding, try this out with a simple page before testing it out on the actual page. For this article, I’m going to add a custom field in the Business justification setup. This setup has two fields out-of-the-box.
Let’s say my organization needs an additional field that’s tied up to a Business justification. Let’s create a simple custom text field that they could use.
- Go to Procurement and sourcing > Setup > Policies > Business justification.
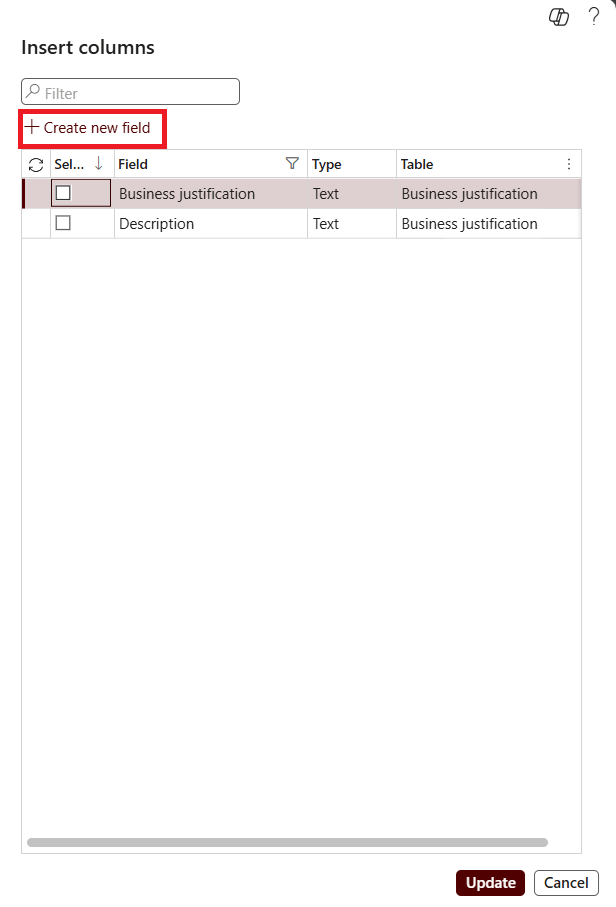
- In the grid/list view, right click and select Insert columns.
-
The Insert columns dialog will be displayed. It shows you the available fields in the related table which you can add to the grid/list view. Since we are creating a custom field, click the Create new field button.
- In the grid/list view, click where you want to add a field.
-
The Create new field dialog will be displayed. Here, you can select which table you want to create a new field in, and enter the other necessary details as shown below.
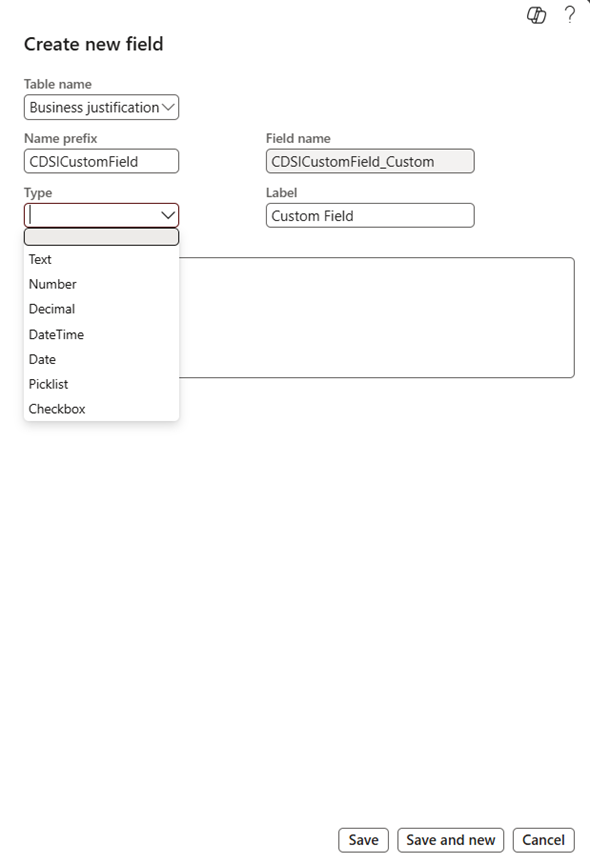
- Table name – For setups as simple as this, there is only one table when you click the drop-down.
- Name prefix – Avoid using spaces when entering a name. It is recommended to add a prefix identifier when customizing fields for you to easily know that it is a custom field.
- Field name – This is automatically populated by the system based on the Name prefix entered.
-
Type – A dropdown list where you can select what data type your custom field should have. For this example, I will be using a Text field.
- If you selected Text, you can define the character length in the Length field.
- If you selected List, you can define the values for your dropdown field
- Label – This is the label for the custom field which will be displayed in the user interface.
- Help text – This field is optional. You can enter a help text which will be displayed when your cursor hovers on the field.
- Click Save. If you want to create another custom field, you may click Save and New. At the time of this writing (April 2025), Microsoft documents that the maximum custom fields you can create per table using this feature is 20.
-
Once done, the Insert columns dialog will be displayed. Mark the Select checkbox of the custom field and click Update. The custom field must now be displayed on your grid/list view.
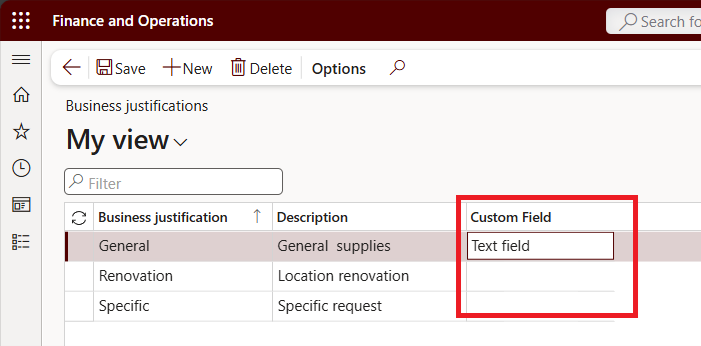
This feature has been available for a while and falls under Personalization. You can save your view afterwards to include the custom fields and publish it later to other users.
Another thing you might ask about, if I do this now, will the field be available when I use Data management later to import and export this in and out of the system?
The answer is Yes!
How do we do that? Watch out for part 2!
Want to know more? Talk to us and send us a message at cdsi.admin@cdynamix.net.
Solutions that solve
We optimize business applications and provide effective software solutions.